官方授權台灣代理分銷
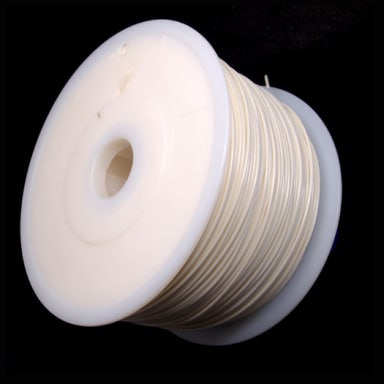
Replicape Rev B - 3D打印機控制器板


原名
Replicape Rev B - 3D printer controller board
貨號
102991007
分類
BeagleBone
特價
3,822
商品停售
由於停止生產、銷量不佳、升級改版... 或其他因素,SeeedStudio 原廠目前已經停止生產、供應、或銷售本件商品,請尋找其他替代品方案。
資料來源:https://www.seeedstudio.com/Replicape-Rev-B---3D-printer-controller-board-p-2942.html
Description
Replicape is a high end 3D-printer electronics package in the form of a Cape that can be placed on a BeagleBone Black. This page is about the Major revision B. It has five high power and low noise stepper motors with cool running MosFets and it has been designed to fit in small spaces without active cooling and without the need for physical access to the board once installed. That means no potentiometers to trim or switches to flip.
This page is about the hardware. It explains how to install the board and wire everything up. If you are looking for software that will run, have a look at the Kamikaze CNC image. There are other options as well, but that is the standard that will work for most people.
|
Blazing fast Replicape runs on BeagleBone Black, a 1GHz CPU with two additional 200 MHz PRUs. What does that mean? It means you can have a huge delta while still running OctoPrint and Toggle. |
 |
 |
Stealthy silent By using the industry leading TMC 2100 stepper motor drivers, the sound leves are lowered to an incredibly low level. The stepper motor whining will not be the most prominent sound for your 3D-printer. |
|
Smart and connected Replicape is a connected device, meaning it has access to the internet. That is good, because it means it can run a web server giving instant access to all computers and smart phones in the network. |
 |
Mounting the Replicape on the BeagleBone.
As the name suggests, Replicape is a cape. Capes are one of the defining things about BeagleBone black/white/green, where the main development board acts as a base unit, and then accepts different add-on hardware through the two 48 pin headers, which in turn define some of the pin behaviors during Linux kernel startup. This is similar to"shields"on Arduino and"HAT"s on Raspberry Pi. Mounting the Replicape on BeagleBone should be pretty straight forward, just make sure the notch in the cape goes around the Ethernet connector so it makes a.. cape!
How to wire up the board
Fritzing example
The Fritzing board below shows the most basic setup for connecting the board.

Connector overview

Steppers
Bipolar and hybrid stepper motors are supported with these stepper motor drivers (SMD). Some smaller stepper motors are known to produce a high pitch noise and get very warm even with a low current setting. They will appear to work, but they may very well burn do to the large heat being produced.
With the board oriented as in the above image, the wires for the steppers are:
Rev B2: 1, 2, 3, 4 = OB1, OA1, OA2, OB2
Rev B3: 1, 2, 3, 4 = OA2, OA1, OB1, OB2
Noise
The TMC2100 stepper drivers are designed to be very quiet. However, if the coil resistance on the steppers are too high, the current limit on the stepper drivers are never reached, and this makes the steppers give off a very high pitch sound. If you are experiencing high pitch noise, you might want to experiment with the"stealth mode"which will silence all steppers. This is micro stepping level 7 and 8. Stealth mode might make the steppers somewhat less powerful, but should work for most printers. To calculate if the current limit is reached or not, you can calculate the maximum coil resistance for a given input voltage. If the input voltage is 12V and you want to run your steppers on 1A current limit, the maximum coil resistance can be 12 ohm.
Heaters
The heater output on the Replicape have rugged connectors, with the heat bed having double connectors for redundancy (in case one wire comes loose) and for handling the power load. These are brand Molex connectors that have both screw terminals for easy fitting and slot in connectors for easy disassembly. All the heaters are controlled with PWM. The power MOSFETs controlling the output are AON6758 that are rated at 30V, 32A. For a 12V PSU, this means that the maximum power that can be used on the heated bed is 32 A x 12 V = 384 W. Please remember that there is a 20 A fuse preventing such a large power use on the heated bed. The 20 A fuse is installed to keep the traces on the PCB from over heating.
Thermistors
The thermistor inputs on Replicape have been designed for 100 K NTC thermistors. These are the typical type used for desktop 3D-printers. 10K thermistors can also be used, however the voltage divider setup makes the 100 K thermistors more ideal since the area of most change will be around 100 degrees. TODO: add charts for 10 K and 100 K thermistors showing their ideal temperature for most significant bit change.
Thermocouple
Thermocouple is not supported out of the box, but instead requires some extra care in order to work. Most importantly is to use a voltage divider on the signal so it is converted to a value that the analog input on the BeagleBone can handle: 1.8V. Secondly, the input needs to be sent in on AIN0..AIN3, which are pins P9_37...P9_40. Then, the analog input used needs to be enabled by a device tree overlay, ideally by editing the current DTO. That can be found here. Finally, the software needs to be hacked to make use of the new analog input and conversion.
Inductive sensors
Inductive sensors are typically mounted on the end stop marked Z2. If you have an NPN (sinking) sensor, you can mount it directly on there.
Typically
Brown: 12V (pin 4)
Blue: GND (Pin 2)
Black: Sig (Pin 1, square)
If you have a PNP (sourcing) type, you need to add a pull-down resistor externally between the signal and ground on the sensor. The value is not important, as long as it can comfortably pull a 4.7K resistor low. 1K should be fine.
DS18B20 temperature sensors
The connector marked Dallas W1 can be used for connecting temperature sensors of the type DS18B20. These are relatively low temperature sensors that can handle up to 125 degrees Celsius and are typically used for monitoring the cold end of the extruder which should never reach more than around 60 degrees when printing with PLA. The great thing about using a cold end monitor is that the temperature measurements can be used to regulate the fan on the extruder. That way, the noise level can be lowered further than when using the thermistor as a trigger for enabling the extruder fan.
Switches as end stops
All the end stops have 4.7K (47K on Rev B3) pull-up resistors on the signal lines. Therefore, the best way to connect switches is between the signal and ground pins on the connectors. If the switches have can be connected as normally closed (NC), that is preferable since it will act as a pressed in switch if a cable has been destroyed or removed.
The signals on the end stops as as follows:
pin 1, square, signal (yellow wire in Fritzing diagram above)
pin 2, round, GND (black wire in Fritzing diagram above)
pin 3, round, VCC (red wire in Fritzing diagram above)(5V)
Connectors
Replicape comes with Molex screw terminals for the heaters, hot bed and power input. Most stepper motors comes with the 4 pin Molex 2.54 mm (0.1") female connector attached. Fans and end stops sometimes comes with the right connector, but not always, it depends on the manufacturer. The white 2, 3 and 4 pin connectors on Replicape used for thermistors, end stops and steppers are the MTA-100 series from TE connectivity.
Power
Replicape is powered through a single 12 to 24 V power supply. This powers the BeagleBone as well, through a 5V step down converter. It also supplies 12V for fans and the inductive sensor. If the USB device connector is used, no power is drawn through the connector.
Note that if you do not power the Replicape, the BBB will not be able to properly communicate with it, and you will get an error such as
kamikaze redeem[675]: Error accessing 0x70: Check your I2C address
Hardware details
Pins on the BeagleBone used by replicape
Below is a diagram of the pins that have been used on the BeagleBone.

Technical Details
| Weight | G.W 117.5g |
| Battery | Exclude |
Part List
| Replicape Rev B - 3D printer controller board | 1 |
Documents
Learn

[Wiki]Replicape rev B
Replicape is a high end 3D-printer electronics package in the form of a Cape that can be placed on a BeagleBone Black. This page is about the Major revision B. It has five high power and low noise stepper motors with cool running MosFets and it has been d

Blog
The blog of the thing-printer.
描述
複製是一種可以放置在BeagleBone Black上的Cape的高端3D打印機電子封裝。該頁面是關於主要版本B.它具有五個高功率和低噪聲步進電機,具有酷的運行中的MosFets,並且它被設計成適合小空間而沒有主動冷卻,而且一旦安裝就不需要物理訪問電路板。這意味著沒有電位器修剪或切換到翻轉。
這個頁面是關於硬件。它解釋瞭如何安裝電路板並將其全部連接起來。如果您正在尋找將運行的軟件,請查看 Kamikaze CNC圖像。還有其他選擇,但這是適用於大多數人的標準。
|
B 太快了
複製運行在BeagleBone Black,1GHz CPU,另有200 MHz PRU。
這意味著什麼?這意味著您可以在運行OctoPrint和Toggle時擁有一個巨大的三角形。 |
|
|
隱身沉默
通過使用行業領先的TMC 2100步進電機驅動器,聲音降低到非常低的水平。步進電機鳴叫不會是3D打印機最突出的聲音。 |
|
智能連接
複製是一個連接的設備,意味著它可以訪問互聯網。
這很好,因為它意味著它可以運行一個Web服務器,即時訪問網絡中的所有計算機和智能手機。 |
|
將復製品安裝在BeagleBone上。
顧名思義,Replicape是海角。 Capes是關於BeagleBone黑色/白色/綠色的定義,其中主開發板充當基本單元,然後通過兩個48針頭來接受不同的附加硬件,這兩個48針頭依次定義一些針腳行為在Linux內核啟動期間。這與Arduino的“盾牌”和Raspberry Pi上的“HAT”類似。將復製品安裝在BeagleBone上應該很簡單,只需確保斗篷中的凹槽就繞過以太網連接器,這樣就可以開啟了。
如何連線板
碎裂的例子
下面的開關板顯示了連接電路板的最基本的設置。
連接器概述
踏步
這些步進電機驅動器(SMD)支持雙極和混合步進電機。已知一些較小的步進電機會產生高音調噪音,即使在低電流設置下也會變得非常溫暖。他們會看起來很正常,但是對於正在生產的大量熱量來說,它們可能會很好地燃燒。
如上圖所示,電路板的步驟如下:
版本B2:1,2,3,4 = OB1,OA1,OA2,OB2
修訂版B3:1,2,3,4 = OA2,OA1,OB1,OB2
噪聲
TMC2100步進驅動器設計非常安靜。然而,如果步進器上的線圈電阻太高,則不能達到步進驅動器上的電流限制,這使步進器發出非常高的音高聲音。如果您遇到高音噪音,您可能需要嘗試“隱身模式”,這將使所有步行者都沉默。這是微步進級別7和8.隱形模式可能會使步進器有點不那麼強大,但應適用於大多數打印機。要計算電流極限是否達到,您可以計算給定輸入電壓的最大線圈電阻。如果輸入電壓為12V,並且要在1A電流限制下運行步進電機,則最大線圈電阻可以為12歐姆。
加熱器
Replicape上的加熱器輸出具有堅固的連接器,熱床具有雙重連接器,用於冗餘(如果一根電線鬆動)和用於處理電源負載。這些是Molex連接器,它們都具有兩個螺絲端子,便於在連接器中進行安裝和插槽,便於拆卸。所有加熱器均採用PWM控制。控制輸出的功率MOSFET是AON6758,額定值為30V,32A。對於12V PSU,這意味著在加熱床上可以使用的最大功率為32 A x 12 V = 384 W.請記住,有一個20 A的保險絲可防止加熱床上的這種大功率使用。安裝了20 A保險絲,以防止PCB上的痕跡過熱。
熱敏電阻
Replicape上的熱敏電阻輸入設計用於100 K NTC熱敏電阻。這些是用於桌面3D打印機的典型類型。也可以使用10K熱敏電阻,但是分壓器設置使得100 K熱敏電阻更加理想,因為大部分變化的面積將在100度左右。 TODO:為10 K和100 K熱敏電阻添加圖表,顯示其最高有效位更改的理想溫度。
熱電偶
熱電偶不支持開箱即用,但需要額外的小心才能工作。最重要的是 在信號上 使用 分壓器 ,以便將其轉換為BeagleBone可以處理的模擬輸入值:1.8V。其次,輸入需要在AIN0..AIN3上發送,這是P9_37 ... P9_40引腳。然後,所需的模擬輸入需要通過設備樹覆蓋來啟用,最好是編輯當前的DTO。可以在 這裡 找到 。最後,軟件需要被黑客利用來進行新的模擬輸入和轉換。
感應傳感器
感應傳感器通常安裝在標記為Z2的終端上。如果您有一個NPN(下沉)傳感器,您可以直接安裝在那裡。
通常
棕色:12V(針4)
藍色:GND(引腳2)
黑色:Sig(Pin 1,square)
如果您有PNP(採購)類型,則需要在傳感器的信號和地之間外部添加一個下拉電阻。該值不重要,只要能夠舒適地拉4.7K電阻就可以了。 1K應該好
DS18B20溫度傳感器
標有Dallas W1的連接器可用於連接DS18B20型溫度傳感器。這些是相對較低的溫度傳感器,可以處理高達125攝氏度,通常用於監測擠出機的冷端,當用PLA打印時,擠出機的冷端不應超過約60度。使用冷端監控器的好處是可以使用溫度測量來調節擠出機上的風扇。這樣,與使用熱敏電阻作為啟動擠出機風扇的觸發器相比,可以進一步降低噪聲水平。
切換為終點站
所有終端在信號線上具有4.7K(Rev B3上的47K)上拉電阻。因此,連接開關的最佳方式是連接器上的信號和接地引腳之間。如果開關可以連接為常閉(NC),這是最好的,因為如果電纜被破壞或拆除,它將作為開關按下。
終點信號如下:
針1,方形,信號(黃線在上圖中的分解圖)
引腳2,圓形,GND(黑線在上述分解圖中)
引腳3,圓形,VCC(紅線在上述Fritzing圖中)(5V)
連接器
複印機配有Molex螺絲端子,用於加熱器,熱床和電源輸入。大多數步進電機配有4針Molex 2.54 mm(0.1“)母連接器,風扇和端蓋有時帶有正確的連接器,但並不總是取決於製造商,白色2,3和4針連接器來自TE連接的MTA-100系列用於熱敏電阻,終端和步進器的複制。
功率
複製通過單個12至24 V電源供電。這通過5V降壓轉換器為BeagleBone提供電源。它還為風扇和感應傳感器提供12V。如果使用USB設備連接器,則不會通過連接器拔出電源。
請注意,如果您不為Replicape啟動,BBB將無法正常通信,您將收到如
kamikaze redeem [675]:訪問0x70時出錯:檢查您的I2C地址
硬件細節
BeagleBone上的引腳用於復制
以下是BeagleBone上使用的引腳圖。