現貨供應最新開發模組
Camera Shield


使用特別說明
根據 MCUapps 實測的結果,採用 Arduino Uno (ATMEGA328p) 與 Arduino IDE v1.0.6 進行編譯與下載,本產品可以直接利用原廠提供的函式庫進行操作無誤。如果採用其他設定與開發板,也許會碰到 UART 通訊問題,主要癥結在於 Arduino 所附帶的 SoftwareSerial 函式庫設定於相機晶片預設的 38400bps 工作時,會有穩定度不佳的現象出現,而且隨著 IDE 版本與 Arduino 晶片不同會有所差異。
不過如果是利用擴充板上的 jumpers 改成與 Arduino 的 digital pin 0 與 pin 1 作 hardware serial 通訊,則工作狀況在各種通訊速率下都可正常無誤。不過就是上傳程式時通訊會打架,需要先把 jumpers 取下,才能順利燒錄新程式。另外,若是採用 Arduino IDE v1.5.8 版,其 SPI 傳輸似乎有點奇怪,在取回 picture 資料時,會多拿到 32 個 0,需要丟掉並加上延遲來解決,推測可能也是 Arduino 函式庫版本問題。
一些實際心得提供給用戶參考。其他相關設定問題,歡迎直接發問交流!
原廠連結:http://www.seeedstudio.com/wiki/Camera_Shield
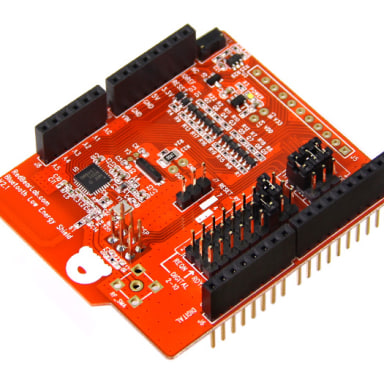
Introdcution
Camera Shield is the first shield board that support photograph, it is based on the solution of VC0706 + OV7725, the former is a high performance camera processor with enhanced image processing functions and it embedded the hard-wired JPEG codec, and the latter is a high-performance 1/4 inch, single-chip VGA camera and image processor in a small footprint package. We have written our library to control the Camera Shield via UART/SPI, which makes it possible to take picture easily by your Arduino board. Come on and use it to take a photo!
Specification
- Fully Compatible with Arduino or Seeeduino
- Still Picture Resolution: (640x480) JPEG Output
- High Speed Serial Bus Control: UART/SPI
- Integrated MicroSD card Interface
- Power Supply: 5 V
Hardware Interface
Camera Shield can be controlled via SPI or UART interface.


Getting Started
Here is a brief introduction to use Camera Shield.
1. Download the Camera Shield library file from gitHub and then extract the library file to your Arduino libraries folder.
2. Open the example folder in libraries/Camera_Shield_VC0706, you will find the snapshot example sketch, double click the snapshot.ino file to open it with arduino IDE.
3. We arrange the library to make it possible to control the Camera Shield via Software Serial/Hardware Serial/SPI, you can have your choice via modifying the code.
#include "SoftwareSerial.h"
#include <VC0706_UART.h>
#include <SD.h>
#include <SPI.h>
#define SS_SD  10
//use software serial
SoftwareSerial cameraconnection(2,3);//Rx, Tx
VC0706 cam = VC0706(&cameraconnection);
//use hardware serial
//VC0706 cam = VC0706(&Serial1);
void setup()
{
    Serial.begin(9600);
    Serial.println("VC0706 Camera Snapshot Test ...");
    if (!SD.begin(SS_SD)) {
        Serial.println("SD Card init failed...");
        return;
    }
    if(true == cameraInit()){
        snapShot();
    }else{
        Serial.println("camera init error...");
    }
}
void loop()
{
    //nothing to do
}
bool cameraInit()
{
    cam.begin(BaudRate_19200);
    char *reply = cam.getVersion();
    if (reply == 0) {
        Serial.println("Failed to get version");
        return false;
    } else {
        Serial.println("version:");
        Serial.println("-----------------");
        Serial.println(reply);
        Serial.println("-----------------");
        return true;
    }
}
void snapShot()
{
    Serial.println("Snap in 3 secs...");
    delay(3000);
    if (! cam.takePicture()){
        Serial.println("Failed to snap!");
    }else {
        Serial.println("Picture taken!");
    }
    // Create an image with the name IMAGExx.JPG
    char filename[13];
    strcpy(filename, "IMAGE00.JPG");
    for (int i = 0; i < 100; i++) {
        filename[5] = '0' + i/10;
        filename[6] = '0' + i%10;
        // create if does not exist, do not open existing, write, sync after write
        if (! SD.exists(filename)) {
            break;
        }
    }
    // Open the file for writing
    File imgFile = SD.open(filename, FILE_WRITE);
    Serial.print("create ");
    Serial.println(filename);
    uint16_t jpglen = cam.getFrameLength();
    Serial.print("wait to fetch ");
    Serial.print(jpglen, DEC);
    Serial.println(" byte image ...");
    int32_t time = millis();
    cam.getPicture(jpglen);
    uint8_t *buffer;
    while(jpglen != 0){
         uint8_t bytesToRead = min(32, jpglen);
         buffer = cam.readPicture(bytesToRead);
         imgFile.write(buffer, bytesToRead);
         //Serial.print("Read ");  Serial.print(bytesToRead, DEC); Serial.println(" bytes");
         jpglen -= bytesToRead;
    }
    imgFile.close();
    time = millis() - time;
    Serial.println("Done!");
    Serial.print("Took "); Serial.print(time); Serial.println(" ms");
    cam.resumeVideo();
}
use Hardware Serial or Software Serial for communication
we use Serial(Software Serial or Hardware serial) to communicate with Camera Shield, you can generate your applicance like below:
//use software serial
SoftwareSerial cameraconnection(2,3);//Rx, Tx
VC0706 cam = VC0706(&cameraconnection);
or if you want to use the hardware serial, you can do it like below:
//use hardware serial
VC0706 cam = VC0706(&Serial1);
We use the software serial by default. If hardware serial is your choise, you need to modify the code in VC0706_UART head file. Change
#define USE_SOFTWARE_SERIAL 1
to
#define USE_SOFTWARE_SERIAL 0
Use UART or SPI for data transmission
Usually, you can take a picture by the following steps:
cam.takePicture();
uint16_t jpglen = cam.getFrameLength();
cam.getPicture(jpglen);
buffer = cam.readPicture(bytesToRead);
and we allow you to read data via two mode:
- 1. UART —— slower mode. Software Serial only support 9600/19200 baud rate. Hardware Serial can be 115200/38400/19200/9600. It will take about 30s to get a picture if you choose the uart mode and at 19200 baud rate.
- 2. SPI —— faster mode. It will only take about 1s or 2s to get the whole picture back.
You can choose your mode in VC0706_UART header file. We use the SPI mode by default.
#define TRANSFER_BY_SPI 1
change it to
#define TRANSFER_BY_SPI 0
to use the UART mode.
4. Stack the Camera Shield onto Arduino and Insert a mocro-SD card to the Camera Shield, you should pay attention to the serial jumpers that you defined in you code.
5. Compile the sketch and upload it to your arduino board. Open the Serial port of Arduino IDE, you can see the debug information shown from the Serial port. and the SD card status LED will blink quickly during the data transfer.
6. When the program finishes, pull out the SD card and insert it to your computer, you can see your photos. Have fun
Resources
資料來源:https://www.seeedstudio.com/Camera-Shield-p-2106.html
Description
Camera Shield is the first shield board that support photograph, it is based on the solution of VC0706 + OV7725, the former is a high performance camera processor with enhanced image processing functions and it embedded the hard-wired JPEG codec, and the latter is a high-performance 1/4 inch, single-chip VGA camera and image processor in a small footprint package. We have written our library to control the Camera Shield via UART/SPI, which makes it possible to take picture easily by your Arduino board. Come on and use it to take a photo!
Features
Fully Compatible with Arduino or Seeeduino
High Speed Serial Bus Control: UART/SPI
Integrated MicroSD card Interface
Specification
Still Picture Resolution: (640x480) JPEG Output
Power Supply: 5 V 100mA
Technical Details
| Dimensions | 115mm x 75mm x 25mm |
| Weight | G.W 46.5g |
| Battery | Exclude |
Part List
| Camera Shield | 1 |
Documents